Crocheting a table runner is a fun and rewarding project! Here’s a step-by-step guide to help you create a beautiful handmade piece.

Materials Needed:
- Yarn (cotton or acrylic, depending on the look you want)
- Crochet hook (size appropriate for your yarn)
- Scissors
- Tapestry needle (for weaving in ends)
- Measuring tape
Step-by-Step Instructions:
1. Choose a Pattern
You can make a simple or intricate table runner. Here are a few ideas:
- Basic Single Crochet Runner – great for beginners.
- Lacy Openwork Runner – elegant and decorative.
- Granny Square Runner – colorful and modular.
2. Make a Foundation Chain
- Measure your table’s length and width.
- Make a foundation chain as long as your desired width.
- Example: If you want your runner to be 12 inches wide, chain enough stitches to match this width.
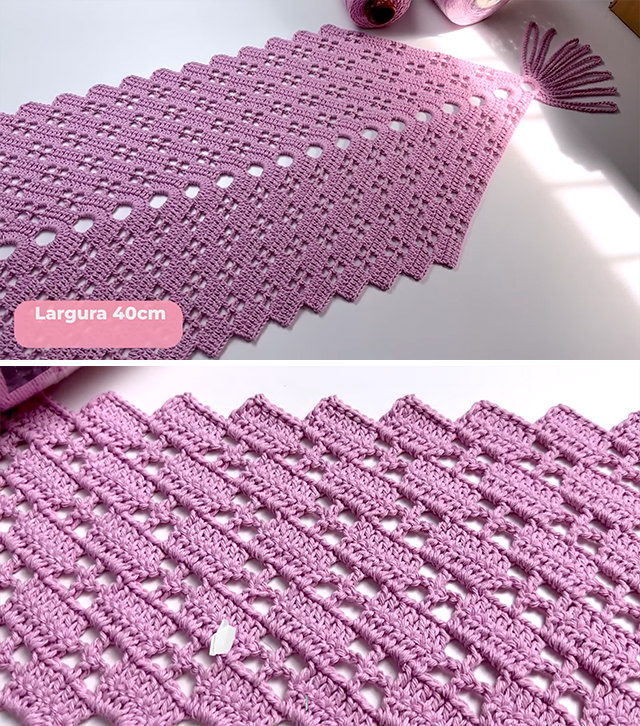
3. Work the Body of the Runner
Choose your stitch pattern and work row by row until the runner reaches the desired length.
Beginner-friendly stitch options:
- Single Crochet (SC): Simple and sturdy.
- Half Double Crochet (HDC): Slightly taller and softer.
- Double Crochet (DC): Creates a looser, more flexible fabric.
Lacy stitch options for an elegant look:
- Shell Stitch
- V-Stitch
- Pineapple Lace
4. Add a Border (Optional)
- Once you reach the desired length, add a border for a finished look.
- Simple options: Single Crochet border or Picot Edge for a decorative touch.
5. Weave in the Ends
- Use a tapestry needle to hide yarn tails securely.
6. Block Your Table Runner (Optional)
- Lightly steam or wet-block the piece to smooth out stitches.
Bonus: Decorative Ideas
- Use multiple colors for a striped effect.
- Add tassels or fringe for a boho look.
- Use thread yarn for a delicate, lace-like appearance.
Would you like a specific pattern recommendation? 😊