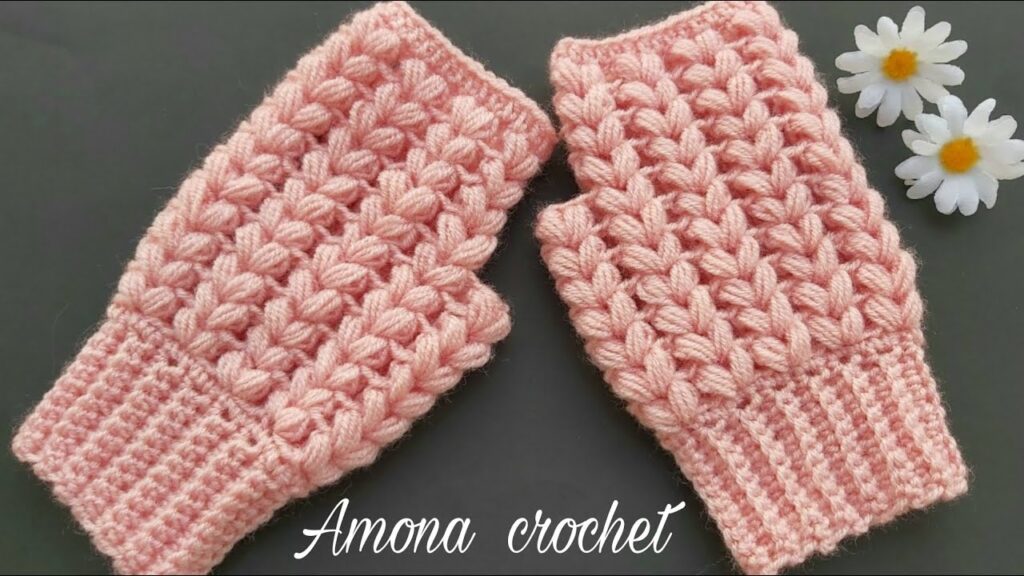
Crocheting puff stitch fingerless gloves is a fun and rewarding project! Here’s a step-by-step guide to help you create your own cozy gloves.
Materials Needed:
- Worsted weight yarn (medium #4)
- Crochet hook (size recommended on yarn label, typically 5.0mm or 5.5mm)
- Scissors
- Tapestry needle for weaving in ends
- Stitch markers (optional)
Abbreviations (US Terms):
- ch = Chain
- sl st = Slip Stitch
- sc = Single Crochet
- dc = Double Crochet
- puff st = Puff Stitch (Yarn over, insert hook into stitch, pull up a loop; repeat 3 times, yarn over, pull through all loops on hook, ch 1 to close puff stitch)
- blo = Back Loop Only
Instructions:
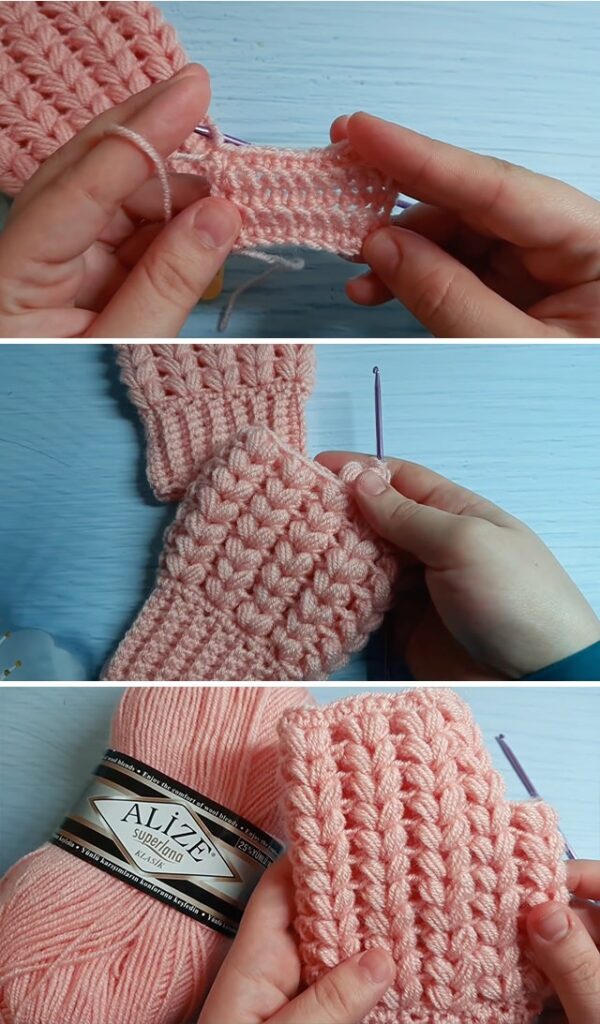
Step 1: Create the Wrist Cuff
- Ch 30-35 (or enough to wrap around your wrist snugly).
- Join with a sl st to form a ring (make sure it’s not twisted).
- Round 1: Ch 1, sc in each stitch around, join with sl st.
- Round 2-5: Ch 1, sc in blo of each stitch around, join with sl st.
- This creates a stretchy ribbed cuff.
Step 2: Start the Main Glove Body with Puff Stitches
- Round 6: Ch 1, puff st in next stitch, ch 1, skip next stitch; repeat around. Join with sl st.
- Rounds 7-12: Repeat Round 6 until the glove reaches the base of your fingers.
Step 3: Create the Thumb Opening
- Round 13: Work puff stitches as normal until you reach the desired thumb opening area. Instead of making a puff stitch, ch 3-5 (depending on thumb size), skip 3-5 stitches, and continue with puff stitches around.
- Round 14: Continue puff stitch pattern, working into the chain stitches.
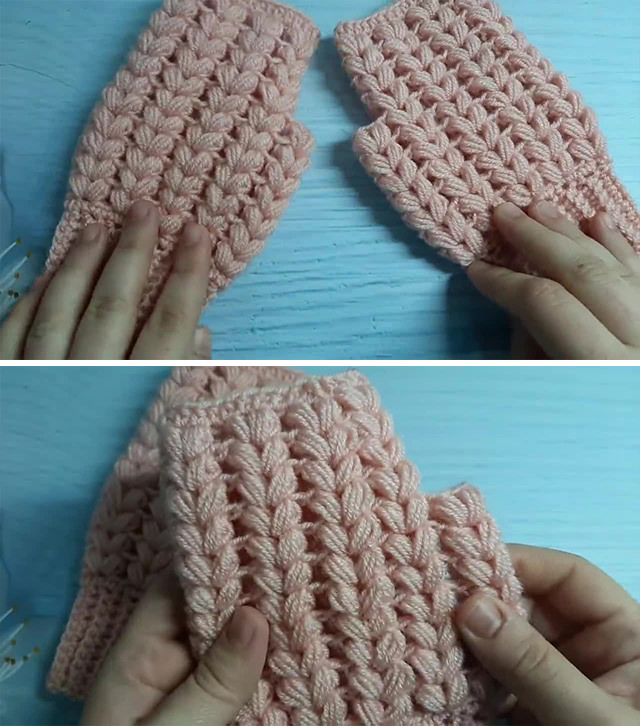
Step 4: Finish the Top Edge
- Round 15-16: Work another round of puff stitches or a simple sc round to create a neat edge.
- Fasten off and weave in ends with a tapestry needle.
Optional: Thumb Section
- If you want a more enclosed thumb, attach yarn at the thumb hole and work a few rounds of sc or puff stitches before fastening off.
Customization Ideas:
- Use a different color for the cuff or edging.
- Add a scalloped edge for a more decorative look.
- Use a finer yarn for a more delicate design.
Would you like a visual chart or step-by-step pictures to help? 😊