That’s a fun and creative crochet project! 🧡🤍
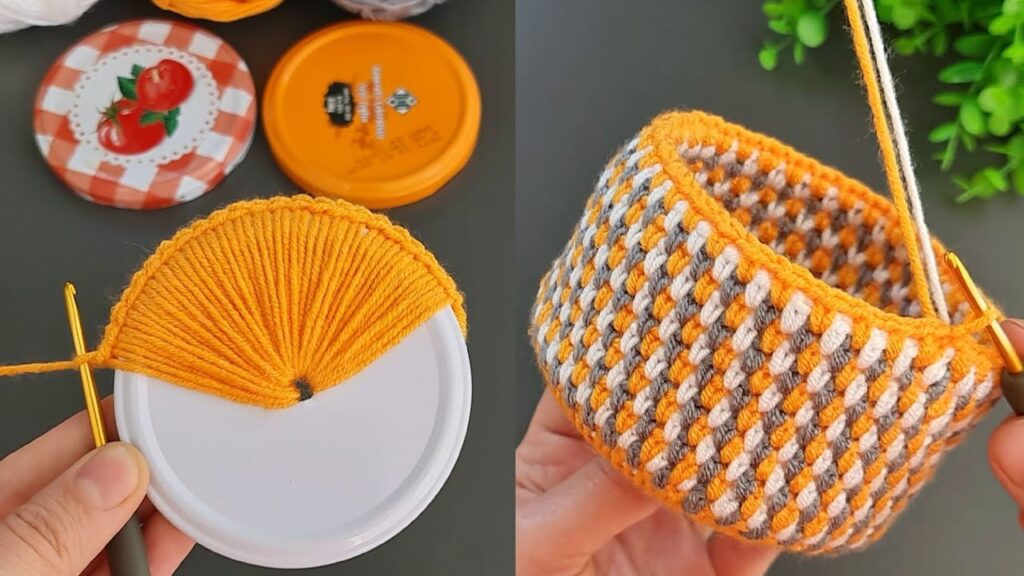
crochet basket or container made using a plastic lid as a base and a mosaic/waffle-style stitch for the sides.
This is a popular technique for making storage baskets, pen holders, or plant pot covers.
Here’s a step-by-step crochet pattern to make exactly this type of project:
🧶 Materials Needed
- 1 plastic lid (round, like from a jam jar)
- Yarn in 3 colors (e.g., orange, gray, and white)
- Crochet hook (2.5–3.0 mm, depending on yarn)
- Yarn needle & scissors
- Awl or heated needle (to make holes in the lid if needed)
🪡 STEP 1: Prepare the Lid Base
- Clean the plastic lid.
- Use an awl or hot needle to make evenly spaced small holes around the edge of the lid (approx. every 0.5–0.7 cm).
- Make sure the holes are large enough for the crochet hook to pass through easily.
🧡 STEP 2: Attach Yarn & Make Foundation Round
- Insert hook through one hole.
- Pull up a loop with orange yarn.
- Ch 1, then single crochet (sc) into each hole around the lid.
- At the end, join with sl st to the first sc.
👉 This gives a clean, even foundation around the lid.
🧶 STEP 3: Vertical Wrap Stitch (Base Cover)
- Still using orange yarn:
- Wrap the yarn over the lid and back through the same hole.
- Pull the loop tight but not too tight.
- Move to the next hole and repeat.
- This creates those tightly packed vertical strands as shown on the left side of the image.
- When the round is complete, slip stitch to finish.
🧵 STEP 4: First Round of Side Wall
- Chain 1.
- Work 1 single crochet into each stitch around the base.
- Join with sl st to the first stitch.
This forms the bottom row of your basket wall.
🧊 STEP 5: Mosaic / Drop Stitch Pattern for the Wall
(Using 3 colors: orange, gray, white)
Repeat the following for each round:
Round A – Orange
- Insert hook in next stitch, pull orange yarn.
- Single crochet (sc) in each stitch around.
- Join with sl st.
Round B – Gray
- Attach gray yarn in any stitch.
- Single crochet in next stitch, then a drop stitch (dc in the stitch 1 round below) alternating.
👉 This creates the “woven” texture. - Join with sl st.
Round C – White
- Repeat the same pattern as Round B, alternating drop stitches and sc.
- Join with sl st.
🌀 Continue alternating these 3 colors until you reach your desired basket height.
🧶 STEP 6: Finishing Edge
- When you’ve completed the last round, fasten off the yarn.
- You can work 1 or 2 rounds of single crochet in orange for a clean top edge.
- Weave in all yarn ends with a needle.
✅ Tips
- Keep your tension consistent for neat vertical strands at the base.
- If your basket starts curving outward too much, tighten your stitches slightly.
- For a stiffer basket, you can use cotton yarn or add a thin cord inside.
🪄 Variation Ideas:
- Add a handle by chaining and attaching both ends.
- Use only 2 colors for a minimalist look.
- Decorate the top edge with a crab stitch (reverse single crochet) for a nice finish.
Would you like me to write the stitch chart (symbol diagram) for the mosaic stitch part too? 🧵✨ (This helps if you prefer to follow visual crochet patterns.)