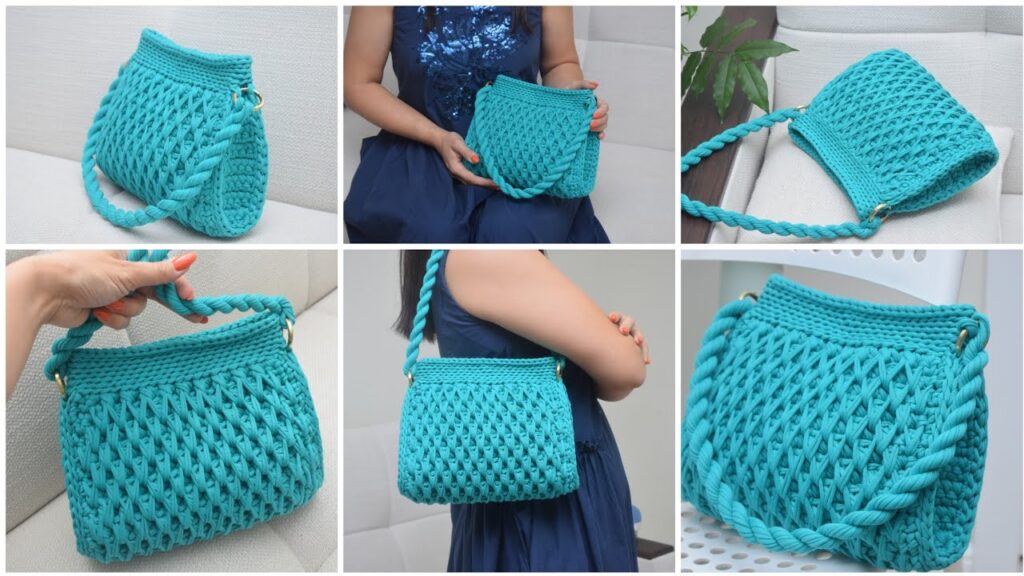
That sounds like a fun and stylish project! Let’s break it down into steps. Here’s a guide to crochet a Honeycomb Stitch Bag:
✨ Materials Needed:
- Yarn: Medium weight cotton yarn (for sturdiness) or your preferred yarn
- Crochet Hook: Match the hook size to your yarn (usually 4.0mm-5.0mm for medium weight)
- Scissors
- Yarn Needle (for weaving ends)
- Bag Handles (optional)
🧶 Step 1: Learn the Honeycomb Stitch
The honeycomb stitch is typically made with a combination of single crochet (sc) and chain spaces, creating a mesh-like pattern resembling a honeycomb.
Here’s a basic breakdown of the stitch pattern:
- Foundation Chain: Chain a multiple of 6 + 2 chains. Example: Chain 38 (6×6 = 36, +2 = 38).
- Row 1:
- Start with 1 single crochet (sc) in the second chain from the hook.
- Chain 5, skip 5 chains, 1 sc in the next chain.
- Repeat (*) across the row. End with a sc in the last stitch.
- Row 2:
- Chain 3 (counts as a double crochet).
- Work 5 double crochet (dc) into the chain-5 space from the previous row.
- Single crochet (sc) into the next sc stitch.
- Repeat (*) across.
- Row 3:
- Chain 1, single crochet into the first sc.
- Chain 5, skip the 5 dc, single crochet into the next sc.
- Repeat (*) across the row.
Repeat Rows 2 and 3 for the honeycomb pattern.
👜 Step 2: Start the Bag Base
- Base Panel:
Create a rectangular base with single crochets or half double crochets.
For a medium tote bag, aim for 30 chains and 5-8 rows of sc/hdc. - Sides:
Work around the base — crochet evenly along all edges, using the honeycomb stitch for the body. - Height:
Keep repeating the honeycomb stitch pattern until you reach the desired height (e.g., 30-35 cm).
🧵 Step 3: Finish Off the Bag
- Top Border:
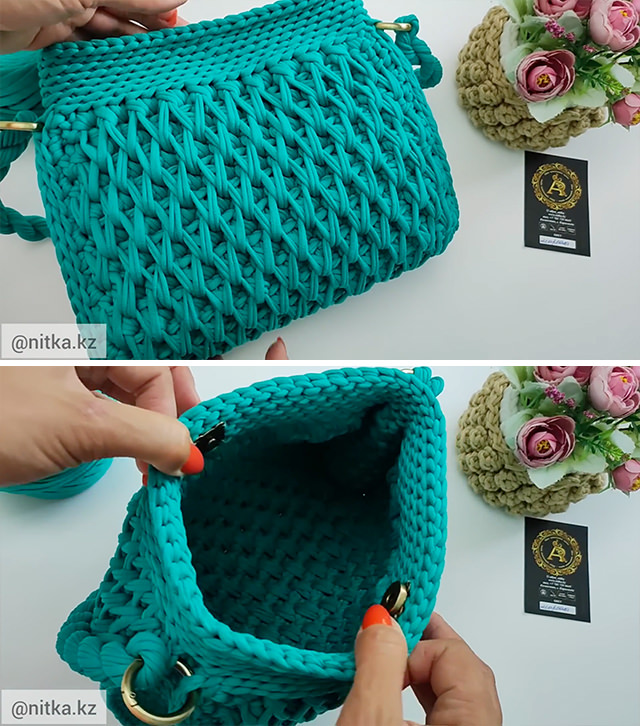
For a cleaner edge, do single crochet or slip stitches around the top edge. - Handles:
- Crochet handles: Chain 60-80 stitches (depends on your preference) and attach to both sides.
- Or attach store-bought handles with a needle and strong thread.
- Secure & Weave Ends:
Secure your work and weave in the yarn ends neatly.
🌟 Tips for Success:
- Tension: Keep your tension consistent for a neat honeycomb look.
- Color Play: Try a contrasting color for the last few rows for a pop of style!
- Lining (optional): Sew a fabric lining inside the bag for extra strength.
Would you like me to write a more detailed pattern with row counts, or maybe even sketch out a visual guide for the honeycomb stitch layout? 🧡✨